Data Kiosk Schema Explorer User Guide
How to use the Data Kiosk Schema Explorer.
Data Kiosk is a new REST API that supports GraphQL query operations for dynamic report capabilities. This tutorial details how to use the Data Kiosk Schema Explorer to explore Data Kiosk datasets and build GraphQL queries. This guide assumes you are familiar with creating, authorizing, and using Selling Partner APIs.
Using the Schema Explorer

When you open the Schema Explorer you have:
- A dropdown selector to select the schema you want to explore and build queries from. The explorer pane on the far right automatically populates with information about the selected schema.
- An icon that, when selected, downloads the GraphQL schema.
- Hyperlinks to the SP-API Documentation and Developer Support.
- A search bar where you can search for specific fields within the selected schema.
- Breadcrumbs of the fields you have previously explored. You can click on any of the highlighted breadcrumbs to be redirected to that field’s information.
- A pane that contains information about queries, fields, data types, and directives, for the selected schema. You can click on any field, data type, or input parameter to view relevant information about what you clicked.
Using the Query Builder

You can build queries using the Query Builder where you have:
- A dropdown selector for selecting a query within the selected schema.
- A pane where you can provide values for the input parameters (for example,
aggregateBy: PARENT,startDate: "2023-11-15"marketplaceIds), and select the fields you want to be returned as part of query processing. Holding⌥Option/ALTwhile clicking on a collapsed field will select its immediate children. The query editor on the right will auto-populate to match any changes made by the query builder, and vice versa. - Buttons to prettify or minify your query for formatting your query to be more human readable, or removing unnecessary information, respectively.
- Buttons to copy, clear, or generate a sharable link for the populated query, respectively.
Using the Query Editor
You can also build queries by manually typing them out using the query editor.

Hovering over a field with your cursor will reveal high-level information about the field.
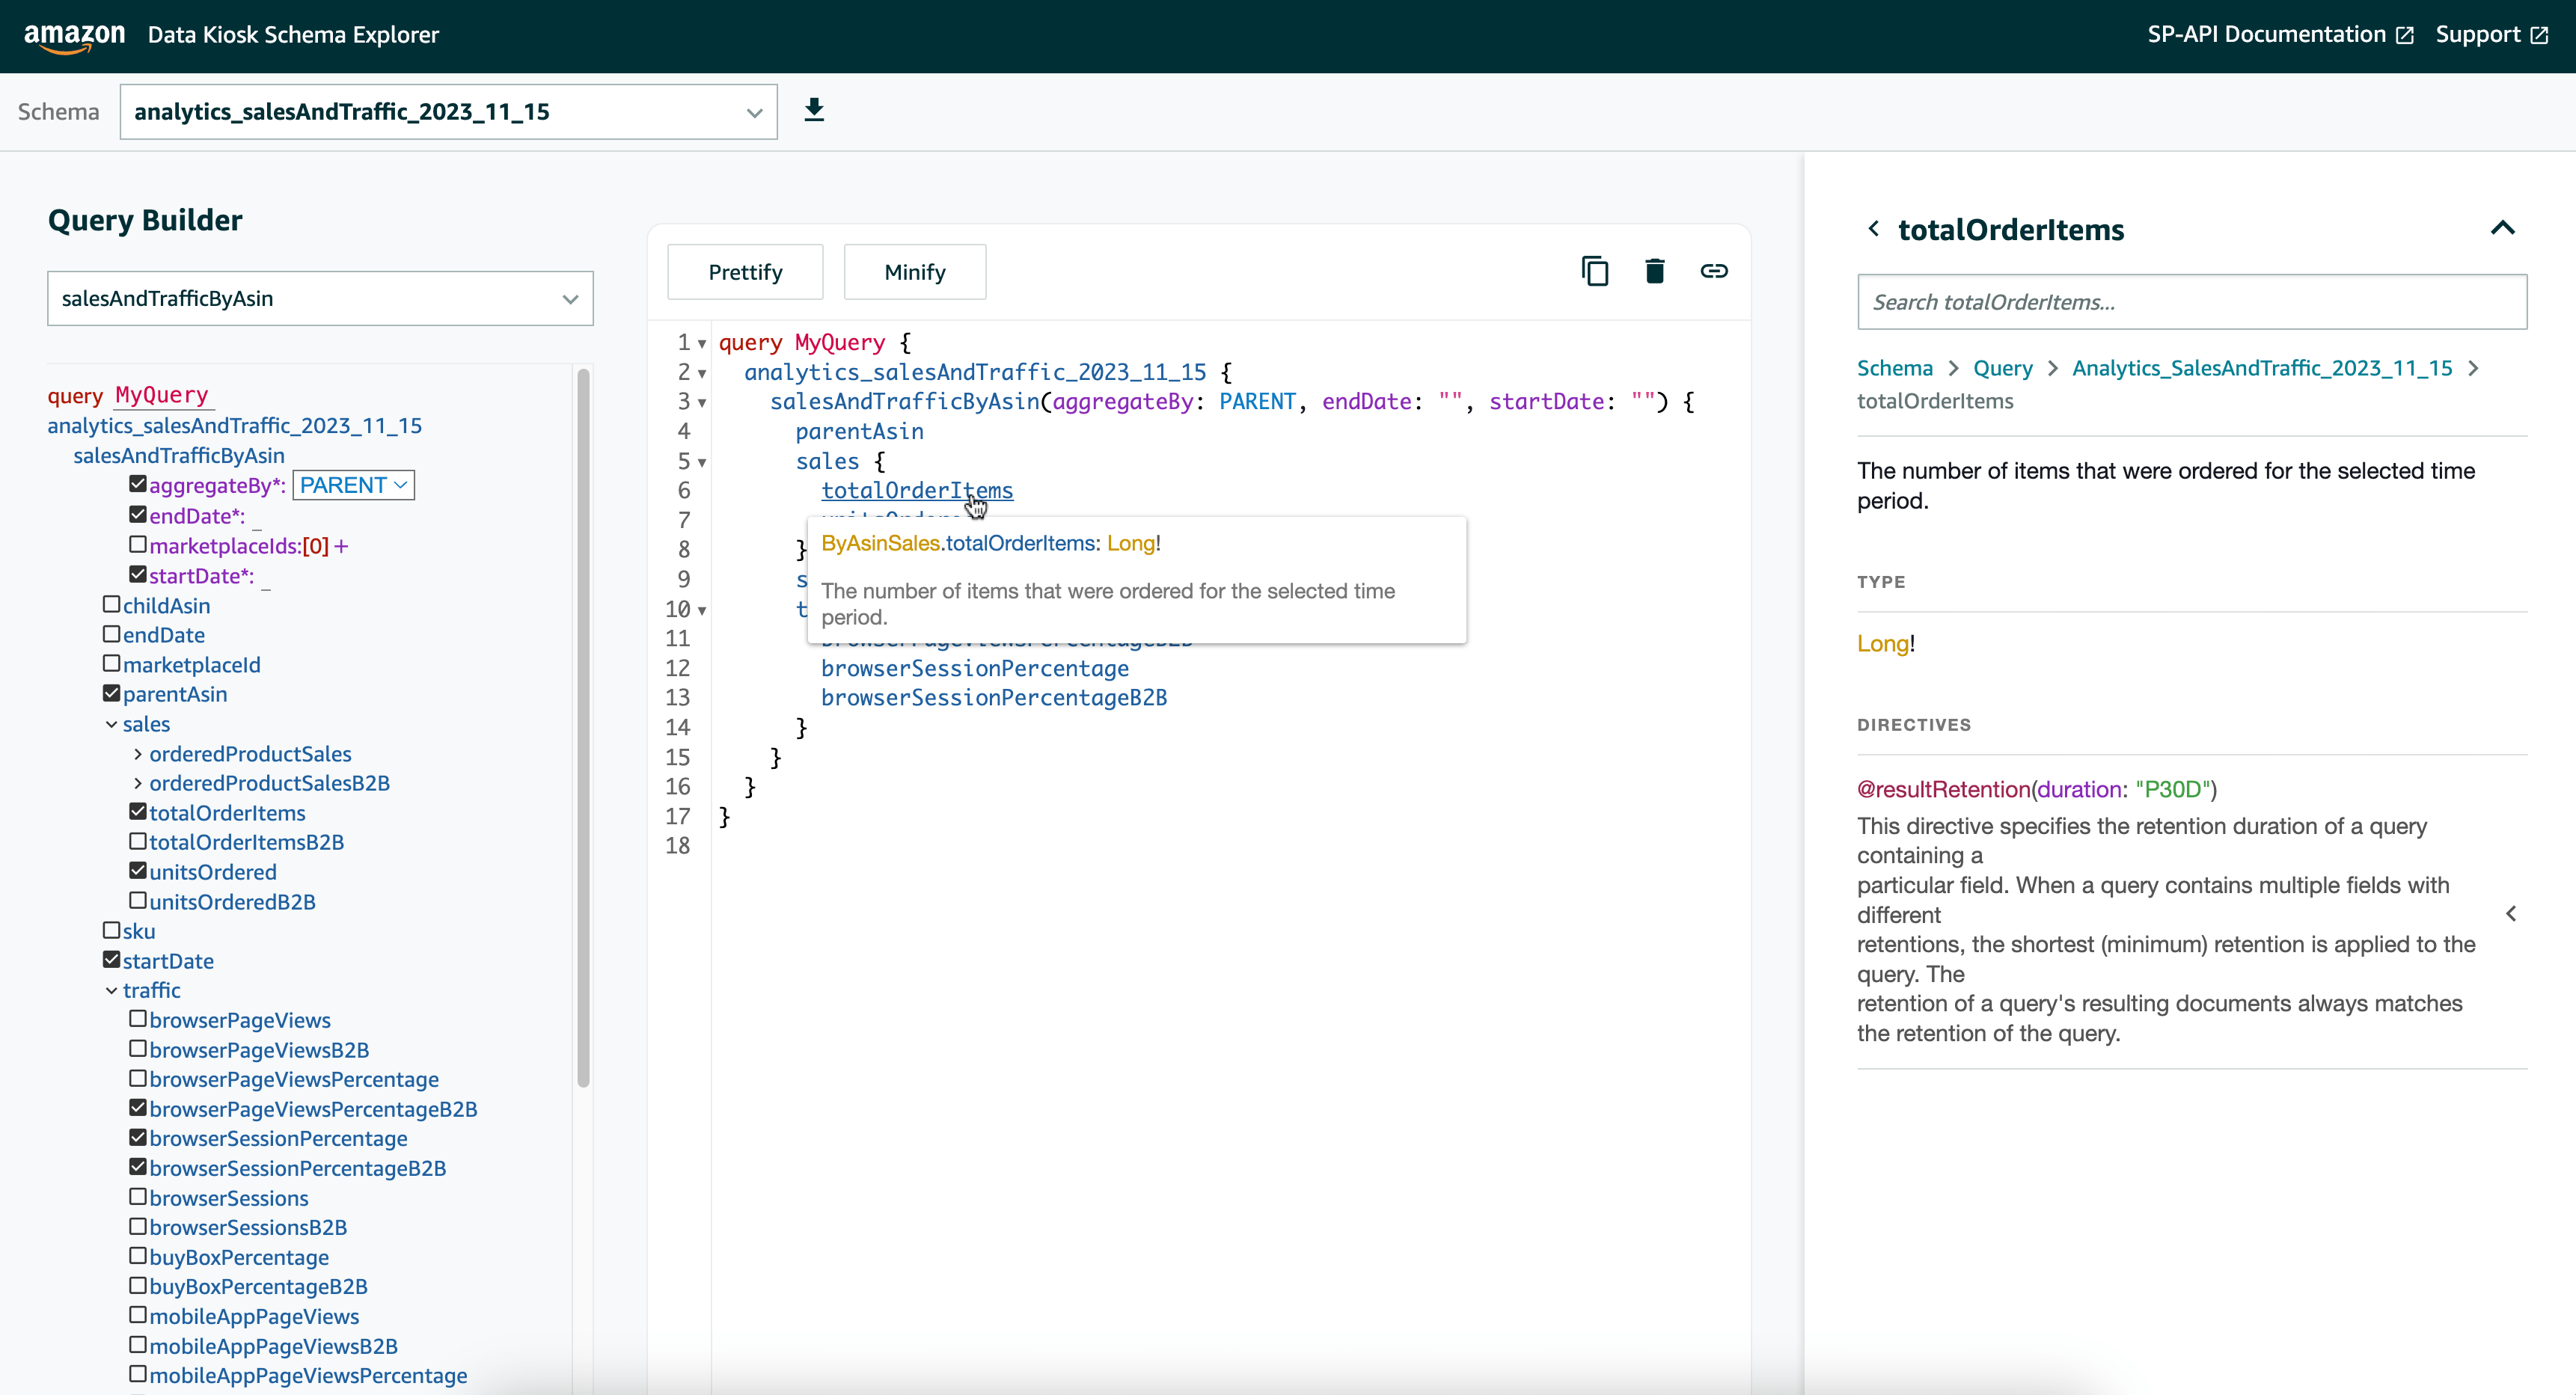
Holding ⌘Command / CTRL while clicking on a field in the editor will open the explorer pane and populate it with information about the field.

Pressing ⌃Control / CTRL + SPACE will open an auto-suggestion dropdown which you can use to quickly select the fields you want.
After you are satisfied with your query, you can use it with the createQuery operation of the Data Kiosk API. Find details of how to use the Data Kiosk API in the Data Kiosk use case guide.
Updated 18 days ago