Authorize your Application to Access Vendor Groups
Learn how to authorize your application to access vendor groups.
Important
The information on this page applies only to vendor applications.
When you authorize your Selling Partner API (SP-API) application to access your data, you grant access to:
- The vendor group associated with the sign-in credentials for your Vendor Central account
- The vendor codes within the vendor group
You must use the correct Vendor Central credentials and vendor group for your SP-API integration. The vendor group is the account you log in to, and can include one or more vendor codes. Use vendor codes to list products in a specific category or to include business agreements, such as one vendor code for a brand.
Tip
You can authorize multiple vendor groups from one developer profile. You don't need to apply for a developer account for each marketplace.
Authorize an application to access multiple vendor groups
Use the Vendor Central self-authorization page to authorize multiple vendor groups for a single application using one developer account. This authorization approach reduces the need to create identical applications for each individual vendor group.
To create authorization grants and generate a refresh token:
-
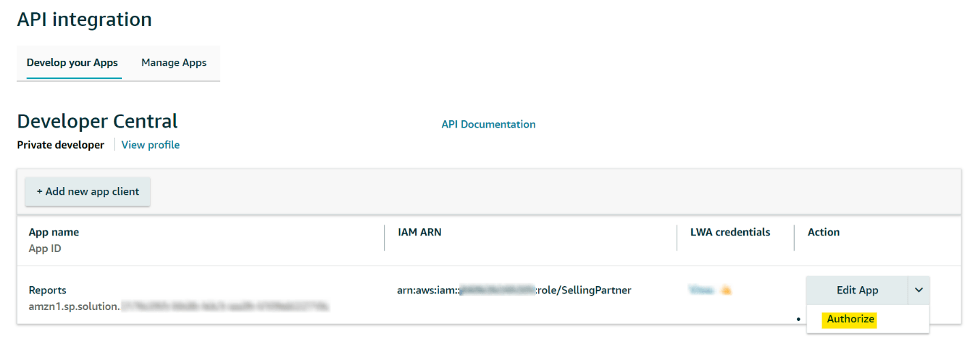
Self-authorize your vendor application in Vendor Central.
Note
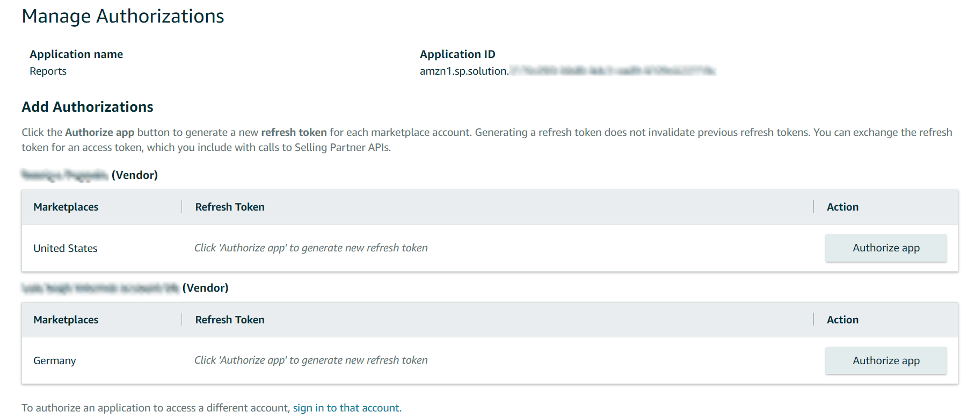
Your developer profile is associated with a specific vendor group. View multiple vendor groups on the Manage Authorizations page. If your vendor group or account is not in this list, sign in to the missing group and navigate to the authorization page for your application. The vendor group is now listed on this page.
-
Choose Authorize app for each vendor group that you want to authorize. Use the generated refresh token to get access tokens, which you can use to call SP-APIs for the second vendor group, and to select the correct call parameters.
Important
Use the refresh token that is assigned to the vendor group you want to access in your API call. If you try to retrieve or submit data related to a different vendor group, the call fails due to an authorization error. For more information, refer to Connecting to the Selling Partner API.
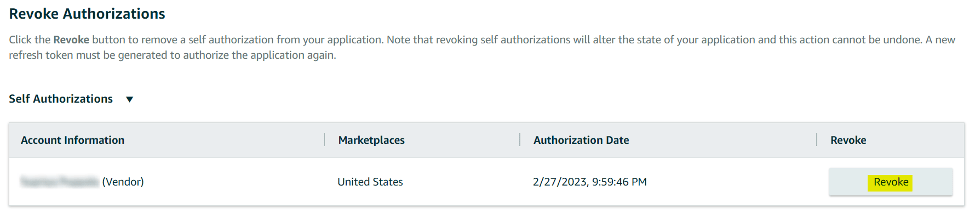
You can authorize a maximum of 10 vendor groups per application. When you reach this limit, you must revoke a self-authorization or contact Vendor Central Support to request a quota increase. To learn how to revoke authorizations from your application, refer to Revoke Self-Authorizations from your Application.
Check the vendor codes in your vendor group
-
Go to Vendor Central for your marketplace.
-
Sign in using the credentials for the Vendor Central account that is associated with the vendor group you want your application to access.
-
In the Settings menu, choose Contacts. Verify that the vendor codes you want your application to access are listed. If the vendor codes are not listed, then you do not have permissions to access the corresponding vendor group. Request access from your vendor organization administrator and try again.
Updated 3 months ago