Amazon Shipping Label Guide
Before you begin sending parcels with Amazon Shipping, you will need to ensure the labels are printed accurately. This ensures there will be no unexpected issues or delays when picking up your packages, such as label scanning issues due to a pixelated QR code.
We accept two kinds of labels – thermal labels printed on thermal printers and A4 integrated labels printed on regular printers. This guide will explain how to print either of the two labels and how to troubleshoot any issues.
Label requirements
Labels must be:
- 10cm x 15cm (4”x 6”)
- Crisp and easily readable
- Printed on white paper
Please see below examples of acceptable and unaccepted labels:
How to print test labels
Please note: The default settings are for thermal labels. If printing A4 integrated labels, adjust the settings to A4 first.
Step 1: Log into the respective shipper central portal:
- UK: https://ship.amazon.co.uk/
- Italy: https://ship.amazon.it/
- US: https://ship.amazon.com/
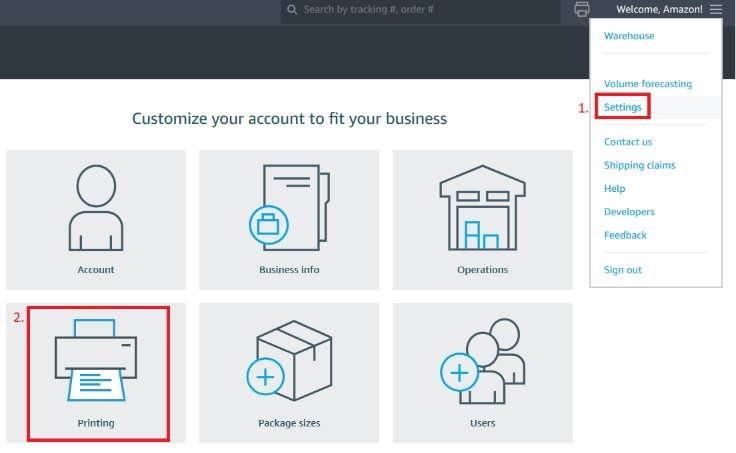
Step 2: Click on the Menu button in the top right corner, select (1.) Settings then (2.) Printing.
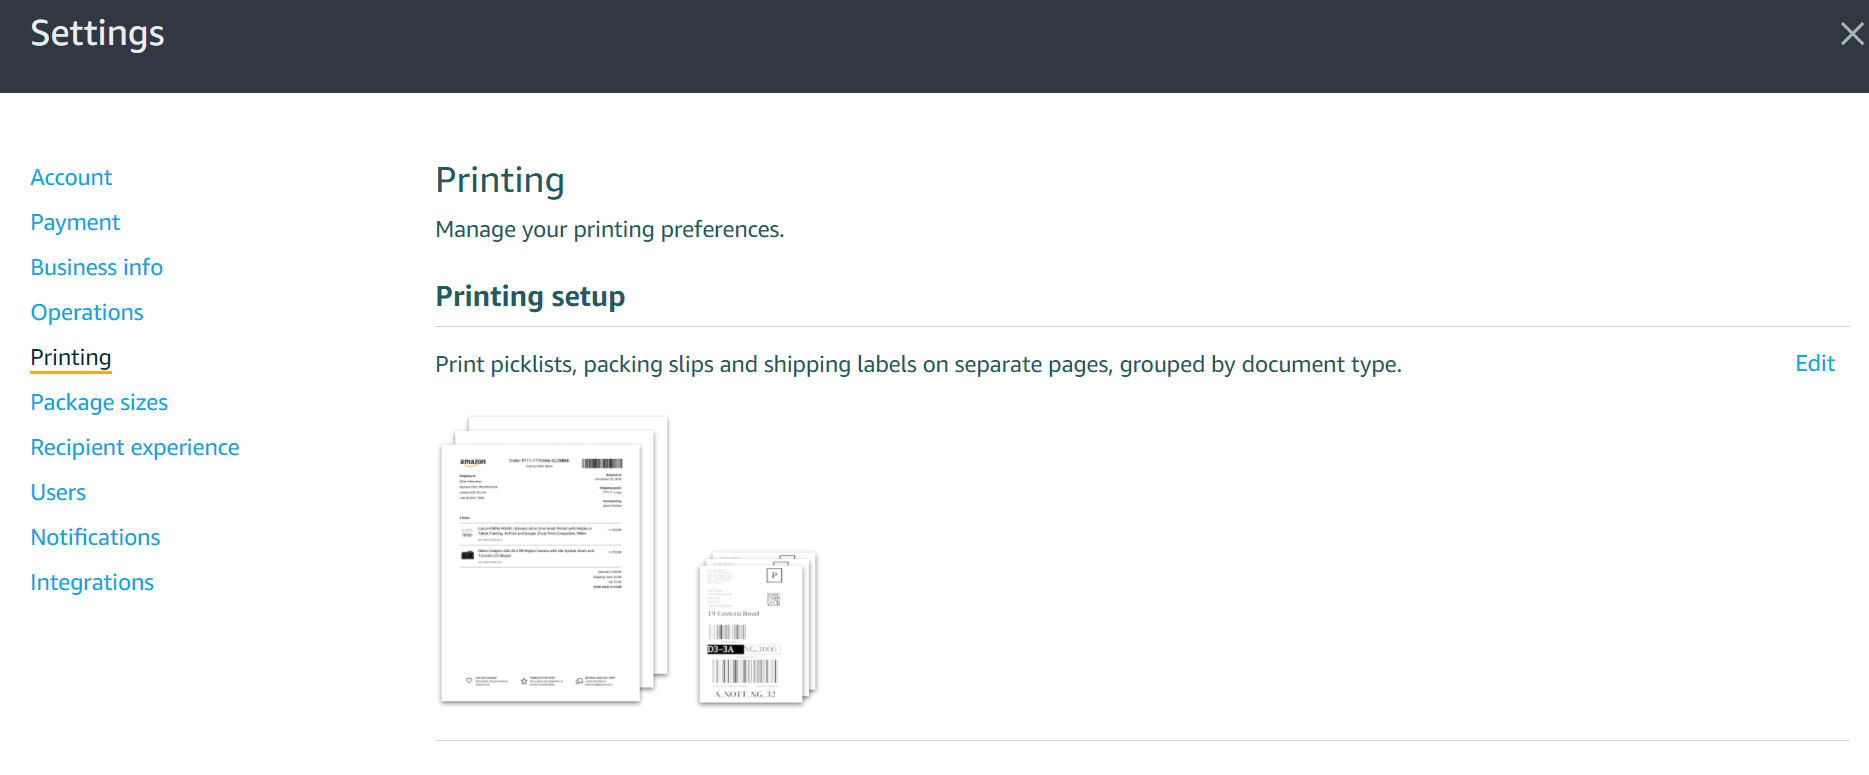
Step 3: On the printing page, click “Edit”
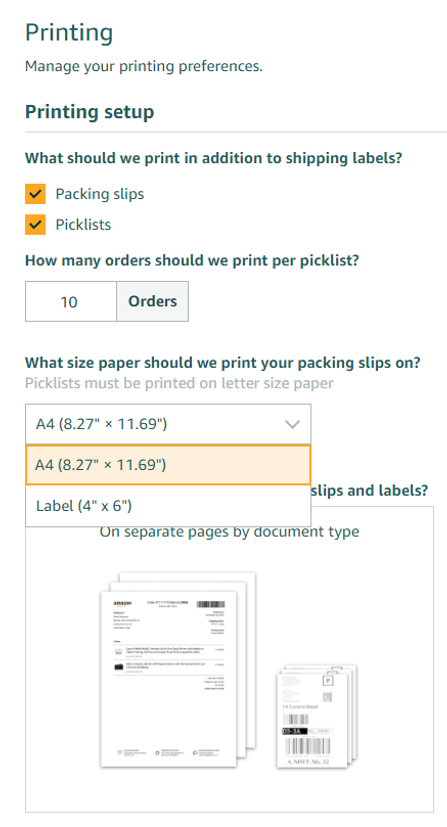
Step 4 (a). From the dropdown window, select ‘A4 (8.27” x 11.69”)’ or Label (4” x 6”) depending on what labels you are using.
Step 4 (b): Select your preferred print type (“on the same page” is recommended). If using A4 integrated labels, you can switch between landscape and portrait positioning by selecting a different template.
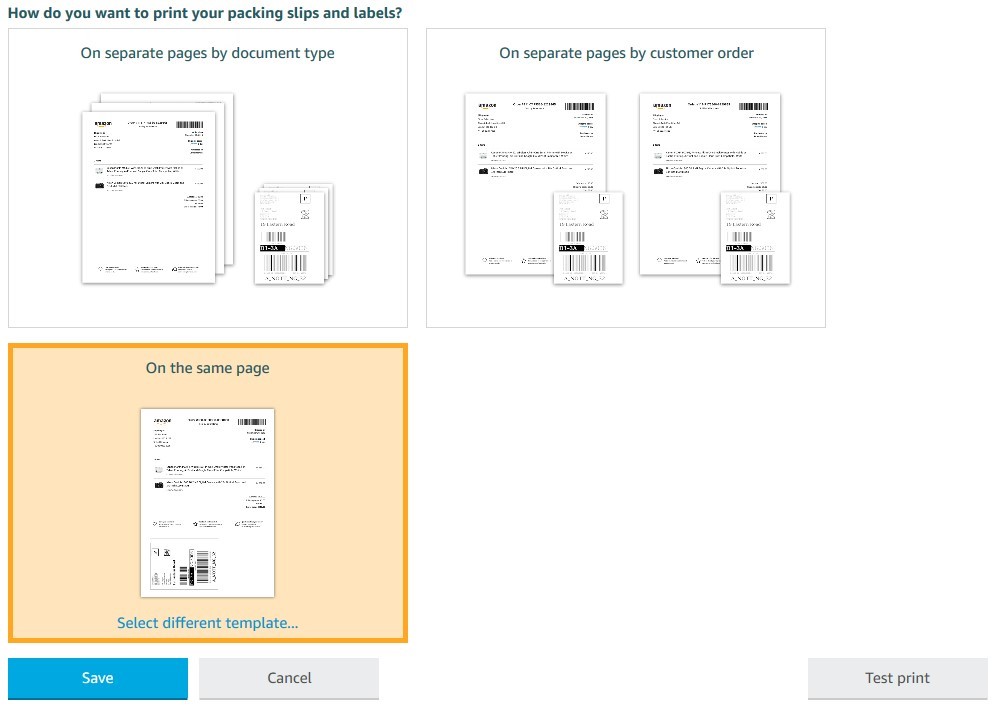
Step 5: To save your settings as default, click “save”. Once your settings are saved, click the “Test print” button on the bottom right of the page.
Step 6: Take a picture of your QR code and send it to [email protected]. You can expect a response within 24 hours with either approval or troubleshooting steps.
Troubleshooting
Wavy QR codes (thermal label issue):
In most cases when you get a pixelated/wavy QR code, it’s to do with your dithering settings, or perhaps printing from your browser. You can follow the steps below to solve this issue:
Step 1: Open your printer settings
Windows: Control Panel > Hardware and Sound > Devices and Printers > Right click on your printer, Select Printing Preferences
Mac: Apple Menu > System Preferences > Printers & Scanners
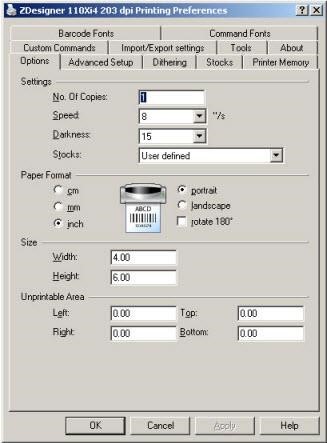
Step 2: Identify your printer and copy the settings seen below for that model.
Step 3: Print your label via a PDF viewer e.g. Acrobat Reader, adobe etc. (typically saving the label to your desktop will open it by default in a PDF viewer when you open it).
In most cases this will make your label crisp. However, if not, please proceed to step four.
Step 4: From your PDF viewer, click on ‘Edit’ then ‘Preferences’. Find the ‘Page display’ section in the left panel and set the Custom resolution to 200 or higher.
Margin issues (A4 integrated labels)
If you find any section of your label is cut off after printing it means your margin settings need adjusting. Below are the correct settings for Portrait and Landscape
Step 1: Open your printing settings
Windows: Control Panel > Hardware and Sound > Devices and Printers > Right click on your printer, Select Printing Preferences
Mac: Apple Menu > System Preferences > Printers & Scanners
Step 2: Typically, in your printer properties or advanced settings, you will find an option to enter in the margins or “unprintable area”. Update this to match the above properties.
Updated 7 months ago
